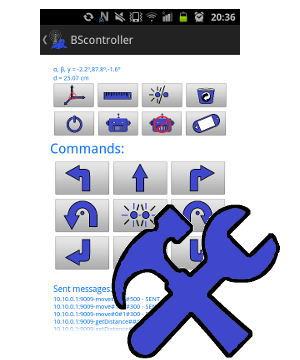
Setting the Basic Controller

In this section we are going to introduce the Settings of the Basic Controller. Especially, we are going to discuss the Settings of individual buttons which can be applied also in the Video Controller.
When we enter the settings BS Starter → Settings/Basic Controller in the menu on the start screen, we see that there are not many things we can set. This is due to the fact that we already set all important values in the bare minimum and all changes of layout can be done dynamically while running the Basic Controller and accessing the menu.
Distinguishing buttons

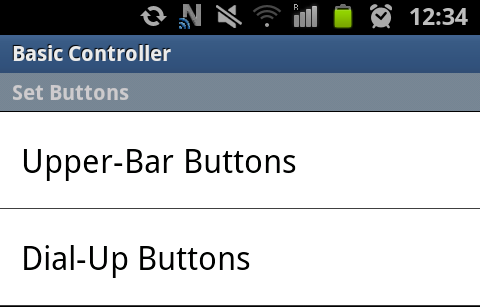
The settings BS Starter → Settings/Basic Controller takes us to the screen shown on the right. The buttons in the Basic Controller are divided into two categories:
- Upper-Bar Buttons - contains 8 buttons on two lines (i.e., 4 by 2)
- Dial-Up Buttons - contains 9 buttons on three lines (i.e., 3 by 3)
These two categories lead us to two distinct settings screens which are shown on the following picture on the left-hand side and on the right-hand side, respectively. On the picture we can also see how the buttons of the Basic Controller are divided into these two categories:

The Upper-Bar buttons are numerated horizontally starting by 01 and ending by 08. The Dial-Up buttons are also numerated horizontally in the same manner as the dial-up buttons on a phone. Their numbers start by 01 and end by 09.
Setting the buttons

Every item on the previous two screens corresponds to one particular button in the Basic Controller and its opening leads to the window with button settings as shown on the picture on the right.
There are two items that can be set for every single buttons separately:
| Name | Type | Description |
|---|---|---|
| Set Image | string (from list) | Here we can set the image for this particular button which will be stored and shown in the Basic Controller. We can choose an arbitrary image for every single button from the list shown below. If we choose the image none, the button will be disabled and will not be clickable. |
| Set Command | string | Here we can set the value for the key $(CMD) of this particular button which will be send to the TCP/IP server as demonstrated in this tutorial. |
List of images
In order to offer versatility for users, one can assign a diverse image to every single button. All available images along with their names are listed in the table below.
Note that if one assigns the blank image none to a button, the button will be disabled in the Controller.
| Image | Name | Image | Name | Image | Name | |||
 |
arrow_backward |  |
arrow_backward_left |  |
arrow_backward_right | |||
 |
arrow_down_left |  |
arrow_down_right |  |
arrow_forward | |||
 |
arrow_forward_left |  |
arrow_forward_right |  |
arrow_left | |||
 |
arrow_forward_right |  |
arrow_rotate_left |  |
arrow_right | |||
 |
arrow_up_left |  |
arrow_up_right |  |
blink | |||
 |
blueseal |  |
camera |  |
camera_no | |||
 |
controller |  |
download |  |
eject | |||
 |
fwd |  |
get_angles |  |
get_angles2 | |||
 |
globe |  |
greendot |  |
change | |||
 |
info |  |
next |  |
none | |||
 |
n_1 |  |
n_2 |  |
n_3 | |||
 |
n_4 |  |
n_5 |  |
n_6 | |||
 |
n_7 |  |
n_8 |  |
n_9 | |||
 |
n_sharp |  |
n_0 |  |
n_star | |||
 |
pause |  |
play |  |
powerswitch | |||
 |
prev |  |
rec |  |
repr | |||
 |
repr_no |  |
repr_volume_high |  |
repr_volume_low | |||
 |
rew |  |
robot |  |
robot_2 | |||
 |
robot_3 |  |
robot_3_no |  |
robot_2 | |||
 |
ruler |  |
ruler2 |  |
save | |||
 |
settings |  |
stop |  |
support | |||
 |
trash_bin |  |
trash_bin2 |  |
wifi |
Conclusion
In this section we learned how to change image and command of every single button in the Basic Controller.


Share this page with friends via